
Sale Charger makes you suffered from ads.
 Sale Charger pop-ups could take over the whole browsers and won't stop repeating. Apart from some sites infected with these pop-ups, random text on the webpage could be underlined with 2 green or blue lines and injected with hyperlinks. As far as attacked by Sale Charger, browser original settings like search engine, extensions and plug-ins may be changed. Homepage and your search result are possible to be replaced.
A massive NO to Sale Charger troubles.
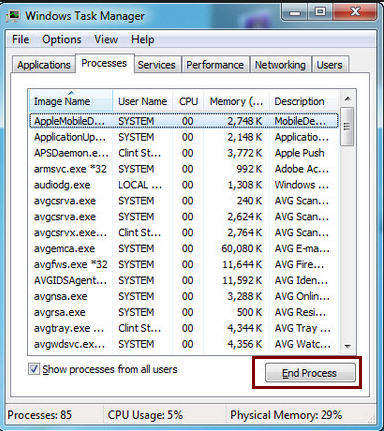
@ Sale Charger may make you face a computer painfully slow. Task manager shows all memory occupied and have bunches of unknown processes running. This all blame to Sale Charger.
@ Continuous pop-ups and websites opening randomly are delivered. It may generate advertises in the top and bottom right of some pages that you visit and the ads are different every time.
@ Infected computer runs poorly. Browsers infected with Sale Charger may be frozen up several minutes at a time when you click on anything and it doesn't matter what it is.
@ Tracking cookies may be attached on your browser during the installation of Sale Charger. As a result, your personal information like browsing activities may be exposed, account log-in details, passwords may be recorded for the criminal hackers
@ System loopholes are maded by Sale Charger, which informs you that the extra following troubles like adware, browser hijacker, trojan and ransomware can break into your PC via the system loopholes.
Remove Sale Charger with Working Methods if You Want
Method 1: Remove Sale Charger Manually from Your Computer
1. remove Sale Charger from the control panel
- Click Start and then choose Control Panel.
- Click Programs> Uninstall a program or Program and Features(for Windows 7,8, Vista)
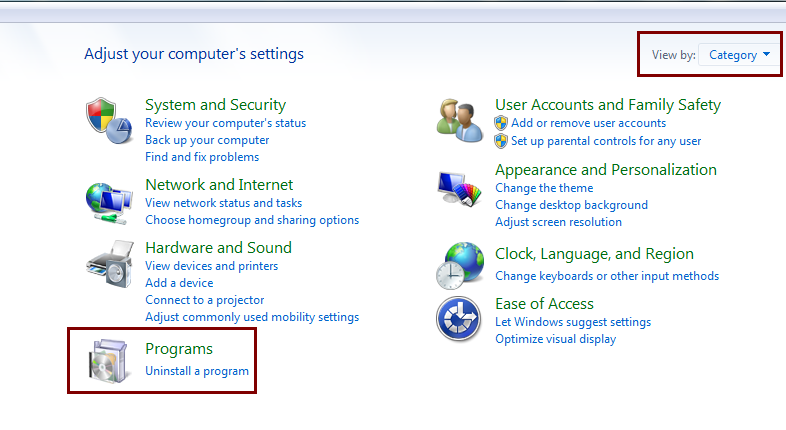
- search for the unwanted or unknown programs; right click it and then choose Uninstall.
( If you think it's complicated or you are not a computer savvy, please download and install the top removal tool to fix the Sale Charger issue automatically.)
2. Remove Sale Charger from the browsers.
2.1 Remove Sale Charger add-ons from Internet Explorer
- Open Internet Explorer then go to Tools menu (press “F10″ key once to active menu bar) and then click on Internet Option a configuration page will be opened
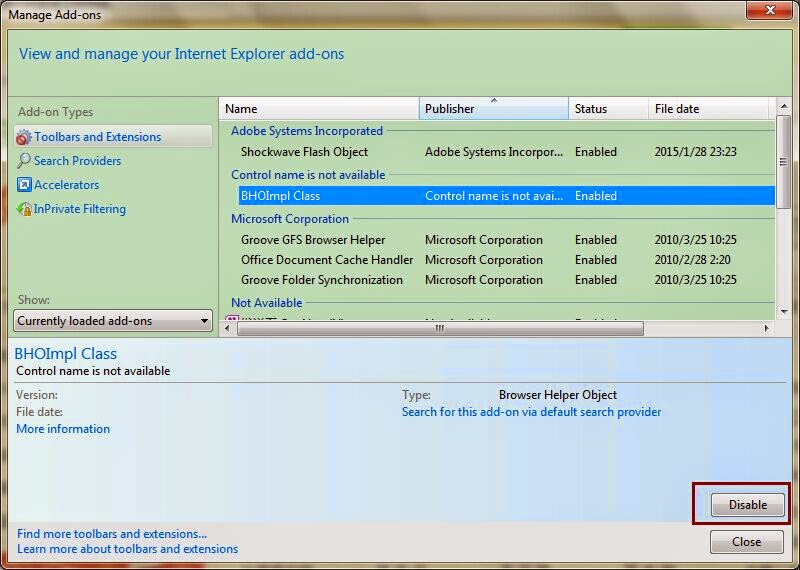
- Click on Programs tab then click on Manage Add-ons, now you’ll get a window which have listed all the installed add-ons.
- Now disable the Sale Charger add-on, also disable all the unknown / unwanted add-ons from this list.
2.2 Reset Internet Explorer
- Open Internet Explorer. Click on Tools menu (Press “F10” key once to active the menu bar), click on Internet Option. A internet option window will open.
- For IE9, IE10 users may click on Gear icon . Then click on tools.
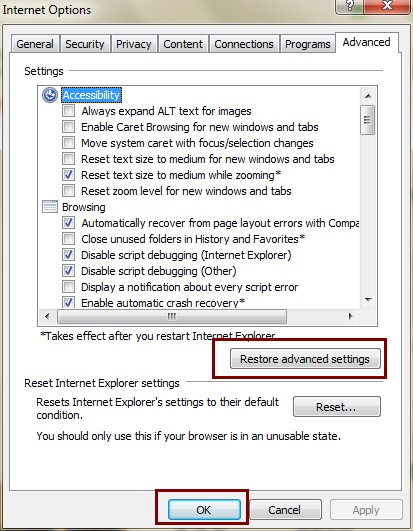
- Click on Advanced tab then click on RESET button.
- Now you will get a new popup for confirmation, tick mark on Delete personal setting then click on RESET button on that.
- Now your Internet Explorer has been Restored to default settings.
- Now you will appear a popup stated “complete all the tasks”. After completion click on close button.
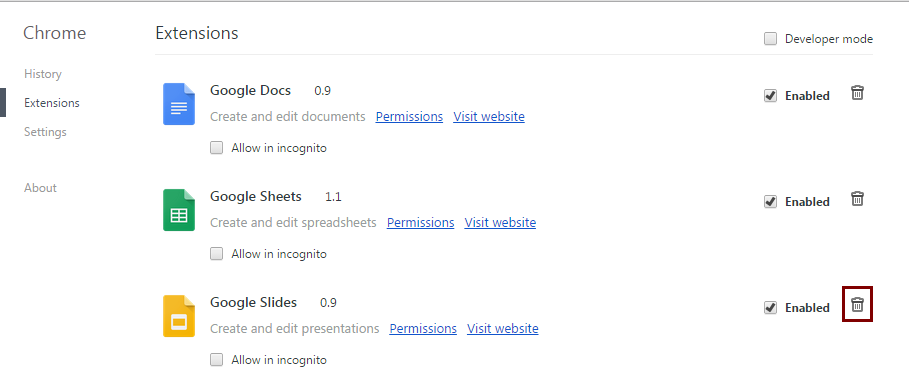
- Start Google Chrome, click on options icon (Located in very top right side of the browser), then click on Tools then, click on Extensions.
- You will get a configuration page which have listed all the installed extensions, remove Sale Charger extension. Also remove all the unknown / unwanted extensions from there. To remove them, click on remove (recycle bin) icon (as shown on screenshot)
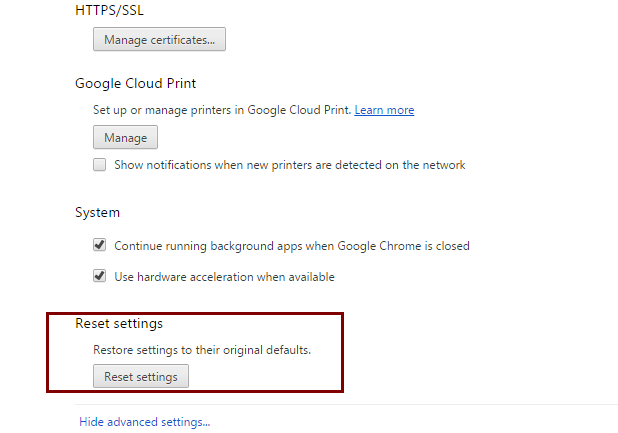
2.4: Reset Google Chrome – Restore to default setting.
- Open Google Chrome, click on menu icon and then click on settings
- Scroll down and click on “Show advanced settings…”option, after click on that you’ll appear some more options in bottom of the page. Now scroll down more and click on “Reset Browser setting” option.
- Now, Close all Google Chrome browser’s window and reopen it again.
2.5 Remove Sale Charger add-ons from Mozilla Firefox
Open Firefox and then go the Tools menu (Press “F10” key once to active Menu bar) click on Add-ons, you’ll get a page click on extensions from the left side pane. now look on right side pane you’ll get all the installed add-ons listed on there. Disable or Remove Sale Charger add-on, also disable all the unknown / unwanted add-ons from there.
2.6 Reset Mozilla Firefox
- Open Firefox and then go the Help menu (Press “F10” key once to active Menu bar)
- Go to Help menu then click on “Troubleshooting information
- You will get a page “Troubleshooting information” page, here you will get “Reset Firefox” option in the right side of the page.
- Click on Reset Firefox option and then follow their instructions to reset firefox.
- Mozilla Firefox should be Restored.
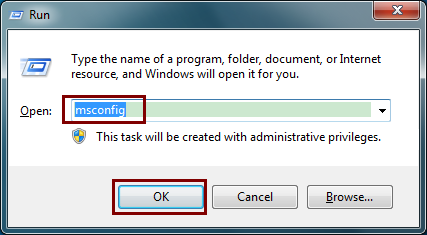
3. To Remove Sale Charger from Startup
- Press “window key + R” (Flag sign key + R) you will get Run box then type “MSCONFIG into the run box then click on OK. You’ll get a msconfig window.
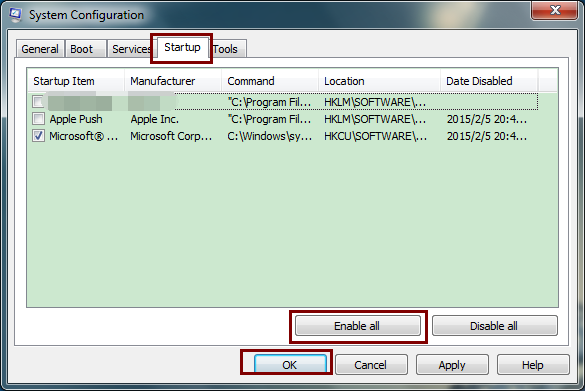
- In the msconfig window click on Startup tab, here you’ll get all the startup entries, so look on the list and then do Un-check the entries which is contains Sale Charger. Also Un-check all the others entries which you found unwanted. then click on OK to apply all the changes
Method 2: Automatic Virus Removal Tool helps to remove Sale Charger.
1. Download the Automatic Virus Removal Tool Now.
(Tip: get into Safe Mode with Networking to download it if your PC performs badly: Restart your computer >> As your computer restarts but before Windows launches, tap “F8″ key constantly >> Use the arrow keys to highlight the “Safe Mode with Networking” option and then press ENTER >> If you don’t get the Safe Mode with Networking option, please restart the computer again and keep tapping "F8" key immediately.)

(Tip: get into Safe Mode with Networking to download it if your PC performs badly: Restart your computer >> As your computer restarts but before Windows launches, tap “F8″ key constantly >> Use the arrow keys to highlight the “Safe Mode with Networking” option and then press ENTER >> If you don’t get the Safe Mode with Networking option, please restart the computer again and keep tapping "F8" key immediately.)
2. Click Ctrl+J together to get the all the download files if you are using Google. Search for SpyHunter-Installer.exe. In order to install the removal tool, you need to give your permission by clicking Run.
Please follow the pop-up box prompts to accomplish the SpyHunter Installation.
Choose Continue to click to get the Install option
Choose "I accept the EULA and Privacy Policy" and then click INSTALL.
You need to be patient when you are arriving 'downloading file'. It will take a while.

Start New Scan and delete all the detected files.

Friendly Tip: it takes more than 30 minutes to accomplish the scanning. You can go away to have a break for yourself.
Here comes the moment. Clicking ' Fix Threats', you are on the right track to remove Sale Charger.
What you should know:
As you can see, Sale Charger is very aggressive and stubborn. If you don't occupy enough expertise, you can't remove it out of PC thoroughly. After your manual removal, you are strongly recommended to download and install the top antivirus program SpyHunter to remove the reminded files associated with Sale Charger.
( Kris )
No comments:
Post a Comment
Note: Only a member of this blog may post a comment.