
A Brief Introduction about Zoom Zoom:
Zoom Zoom is designed for getting benefits and commission by displaying non-official ads on target computer. In general, Zoom Zoom pretend as a freeware shared on the Internet. It claims that it can provide lots of valuable information for you. However, if only you download and install it inside your computer, it starts to getting out of control gradually. It randomly make adjustment to default settings of your computer especially to your browser like Chrome, Firefox or IE, alerting your homepage to a totally different page without your consent. Besides, it can add tons of useless applications and plug-ins into your computer, collecting your search history and your personal information furtively. Then, you will definitely be annoyed as its advertises keep popping up on your screen.Even if you are a person with great patience who can get used to its pop-ups, Zoom Zoom, this nasty program still should not be left on your computer permanently. Firstly, it takes place your PC RAM, and your computer will get slower and slower. Secondly, taking the safety issue into consideration, Zoom Zoom basically need to be cleaned up for which it just like a spy that tracking your online activities 24/7. About the way to remove Zoom Zoom, you can follow this article below.

To remove this disturbing progam, you generally have two ways to choice. The one is remove it with anti-virus program, and the other one is manually delete all its related programs from your computer.
Remove Zoom Zoom Step by Step:
STEP1- Uninstall Zoom Zoom from Windows Control Panel
1. Open Control Panel using instructions below according to your operation system.
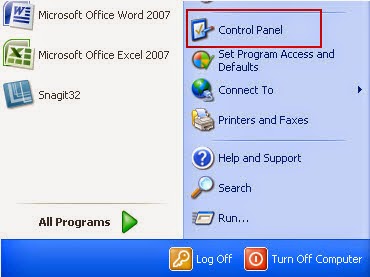
For Windows XP, Vista and Windows 7:
a) Click on the "Start" button on the lower-left of your monitor.
b) Locate and select "Control Panel".
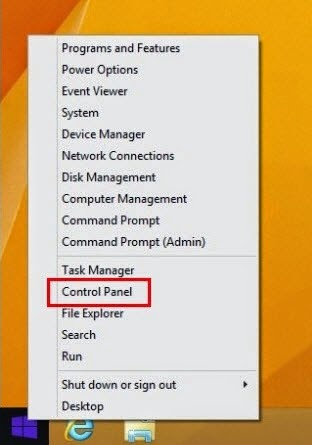
For Windows 8:
a) Hover your mouse on the bottom left corner of the computer screen and wait for the icon to appear.
b) Right-click on the icon to display list of accessible programs.
c) Double-click "Control Panel" icon from the list.
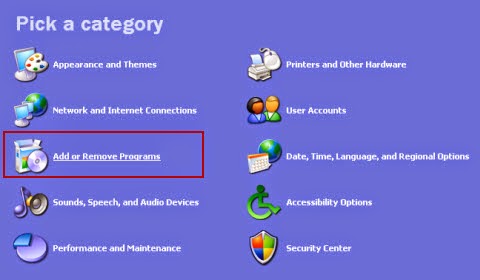
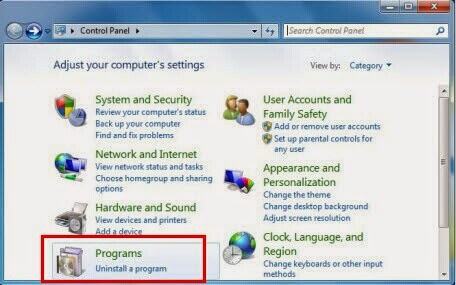
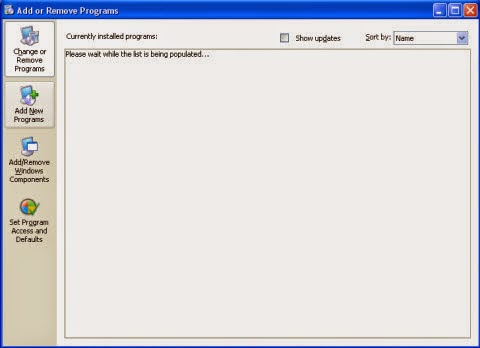
2. When you have Control Panel window open, click on "Add or Remove Program" or "Programs and Features" (if you're using Windows XP/Vista/7). Or find and select "Uninstall a program" under Programs area if you're using Windows 8.
3. Your next display now shows a screen that lists programs that are installed on your computer. Scroll through the list to look for Browsing Protection icon, and then select it to start ridding it from your computer by clicking "Remove" or "Uninstall" button.
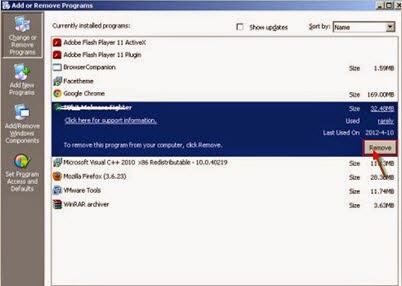
4. On the next prompt, you need to confirm the uninstall process and press "OK" to proceed with the removal.
5. When all steps are done, reboot your computer regularly to apply all made changes.
STEP2- Remove Positive Finds from your web browser
For Internet Explorer users:
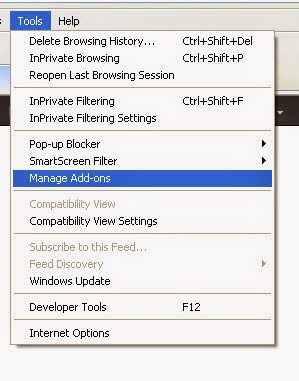
1. Open Internet Explorer, go to ‘Tools’ → ‘Manage Add-ons’ → ‘Toolbars and Extensions’.
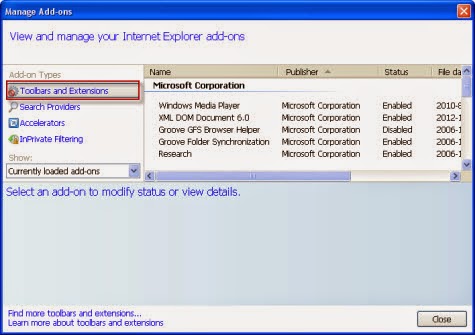
2. In the next page, find Browsing Protection and similar entries, and then click ‘Uninstall’.
3. After that, change your start page.
For Mozilla Firefox users:
1. Access Mozilla Firefox, go to ‘Tools’ → ‘Add-ons’ → ‘Extensions’.

2. Look for Browsing Protection and similar unfamiliar items, and then click ‘Uninstall’.
3. Once you remove it, change the start page.
For Google Chrome users:
1. Click on the Chrome menu button on the Google Chrome browser, select ‘Tools’ → ‘Extensions’.
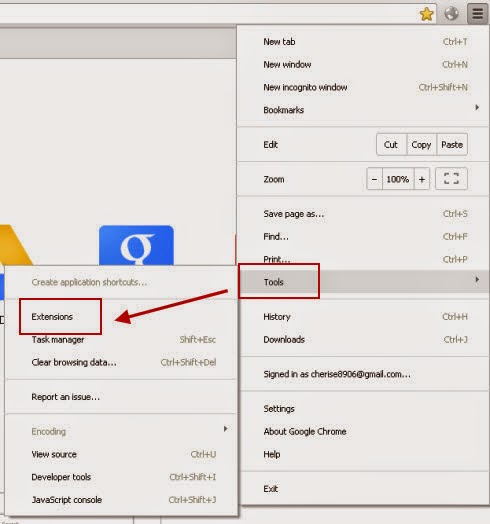
2. Then search for Browsing Protection or similar unwanted extensions and delete them by tapping the Recycle Bin.
3. Remember to change start page.
For Internet Explorer users:
1. Open Internet Explorer, go to ‘Tools’ → ‘Manage Add-ons’ → ‘Toolbars and Extensions’.
2. In the next page, find Browsing Protection and similar entries, and then click ‘Uninstall’.
3. After that, change your start page.
For Mozilla Firefox users:
1. Access Mozilla Firefox, go to ‘Tools’ → ‘Add-ons’ → ‘Extensions’.
2. Look for Browsing Protection and similar unfamiliar items, and then click ‘Uninstall’.
3. Once you remove it, change the start page.
For Google Chrome users:
1. Click on the Chrome menu button on the Google Chrome browser, select ‘Tools’ → ‘Extensions’.
2. Then search for Browsing Protection or similar unwanted extensions and delete them by tapping the Recycle Bin.
3. Remember to change start page.
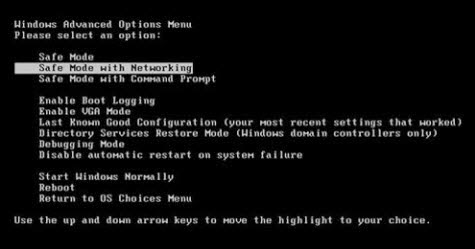
First, reboot your computer into safe mode with networking.
(For WinXP, Win7, WinVista user)
Restart your computer with constantly tapping F8 key, then select safe mode with networking without your keyboard up and down key.

(For Win8, Win8.1 user)
a. Start and login the infected computer until you see the desktop.
Press the Ctrl+ Alt+ Del combination key, the Switch User interface will pop-up.
b. Always hold down the “Shift” key on the keyboard and at the same time click on “Shut down” button once on the bottom right corner of the page.
c. You will get three options there: Sleep, Shut down and Restart. Click on Restart option.
d. The next window says ‘Choose an Option’ screen, and then you need to select “Troubleshoot”.
e. On the troubleshoot page click on ‘Advanced Options’. In the following window choose ‘startup settings’.
f. Choose ‘restart’, and then wait for a minute. Windows will automatically display Safe mode options. At last press F5/5 key to highlight "Safe Mode with Networking" option, hit Enter key as well. Later after that, Windows 8 Operating system will be booted up in safe mode with networking.
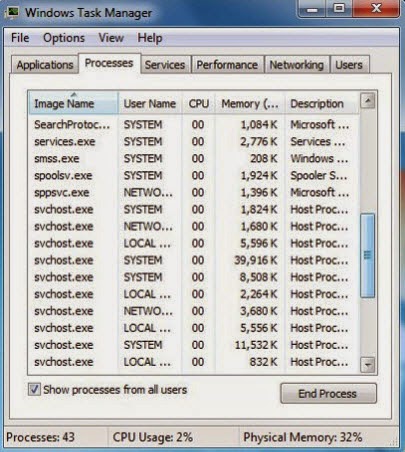
2. Open Windows Task Manager and stop all Positive Finds running processes.
(Guides: Press CTRL+ALT+DEL or CTRL+SHIFT+ESC or Press the Start button->click on the Run option->Type in taskmgr and press OK.)
3. Restart your computer to make those changes work.
Using a Removal Tool to Deal with Zoom Zoom:
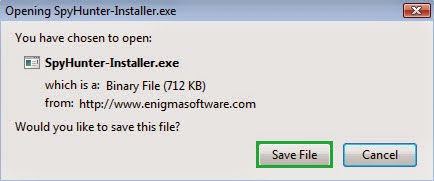
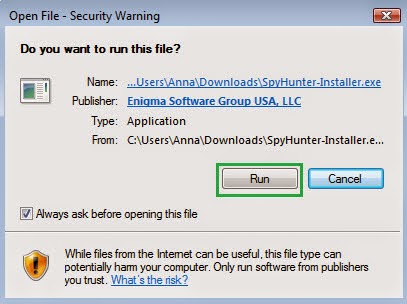
1. You need to get Spyhunter downloaded and installed into your computer.

2. Follow these steps below to install Spyhunter into your computer.
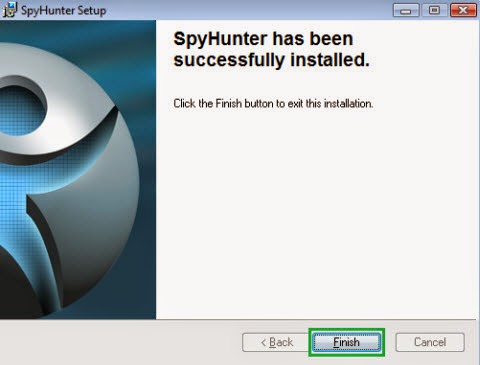
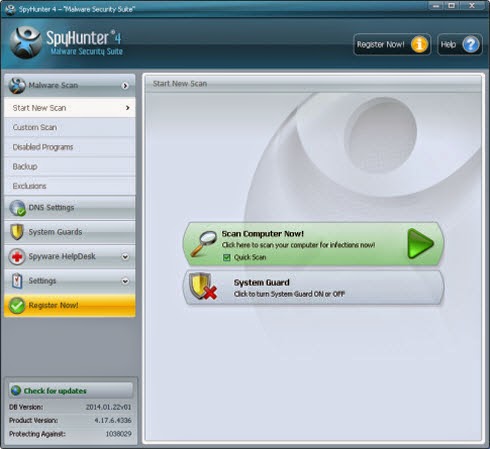
3. Once you get Spyhunter installed into your computer, you should start a full scan to your computer.

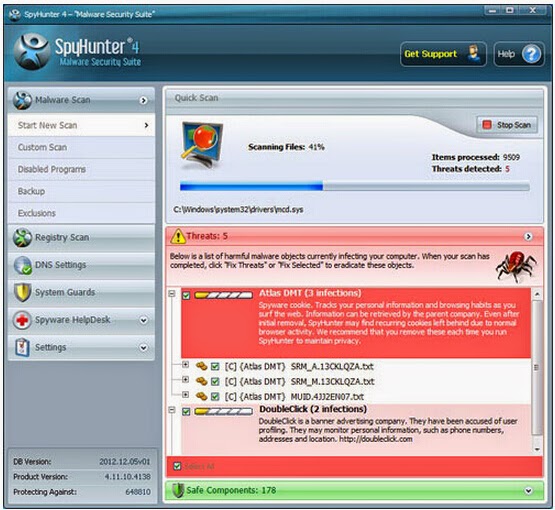
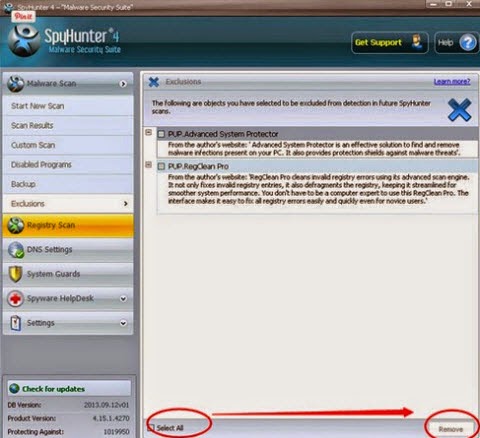
4. If your spyhunter find anything suspicious and harmful, you just need to select all and click the remove button.
5. Restart your computer to make sure it is gone completely.
Note: If you are not a computer experts who is familiar with dealing computer system issue, I have to inform you that you may screw up your computer by accident. So, using a removal tool to get rid of this Zoom Zoom will be more suitable. Click here to get Spyhunter downloaded into your computer to have a try.
No comments:
Post a Comment
Note: Only a member of this blog may post a comment.