
Your PC may be ruined by $Recycle.Bin:
$Recycle.Bin is deemed as a harmful computer virus by PC experts. Once your PC is attacked by $Recycle.Bin , undoubtedly, you may suffer quite a lot of problems and fail to operate your PC as usual. Once $Recycle.Bin is in, it may create so many unwanted files and registries to occupy your limited resources which directly results in the poor running speed and windows freeze.
To run more freely in your system, $Recycle.Bin also alters your start up menu to make it get started immediate as soon as you launch the windows. Even though you only open one or two programs, you get multiple programs running in the Task Manager.
Worse still, $Recycle.Bin helps other infections like worms, rogue software, malware and spyware invade into the target PC. By chiseling up some back doors in the background, $Recycle.Bin successfully cause system vulnerabilities, This is the reason why your PC is easily attacked by malware after the presence of $Recycle.Bin.
In addition, $Recycle.Bin may also track your browsing habits and collect your information like search queries, log-in information and other data and then send to the third party for marketing. For the safety of your operating system and person data, $Recycle.Bin should be removed without any hesitation.
Best Way to Remove $Recycle.Bin Completely
Solution one: Manually Get Rid of $Recycle.Bin
Solution Two: Remove $Recycle.Bin with Spyhunter Antivirus Software
Solution one: Manually Get Rid of $Recycle.Bin
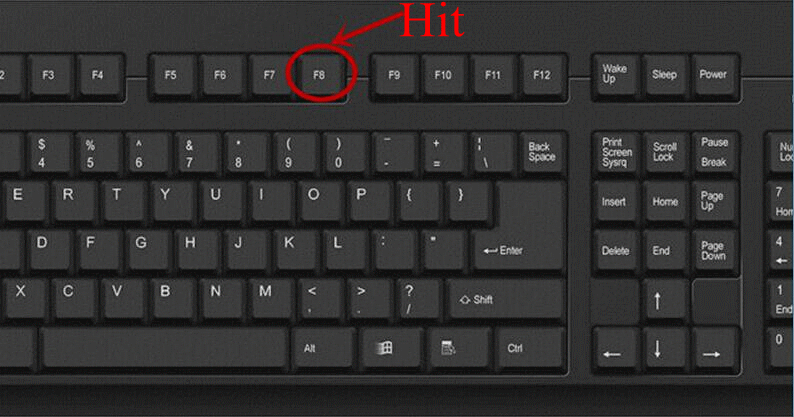
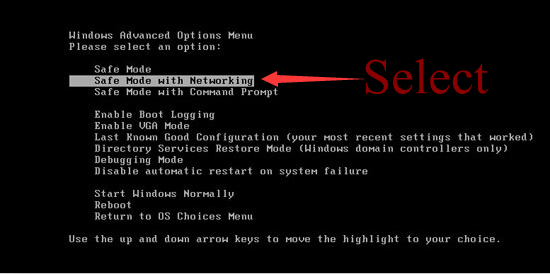
Step one: Get into the safe mode with networking
To perform this procedure, please restart your computer and keep pressing F8 key until Windows Advanced Options menu shows up, then using arrow key to select “Safe Mode with Networking” from the list and press ENTER to get into that mode.
Windows 7/Vista
(1) Go to Start, and then click the Control Panel.
(2) Select Uninstall a Program.
(3) Find $Recycle.Bin related programs and then click on Uninstall.
03WE63~Y%24YT_IVBBXDY.jpg)
Windows XP
(1) Go to Start, choose Settings and then click on Control Panel button.
(2) Click on Add or Remove Programs.
(3) Select Programs and Features.
(4) Find $Recycle.Bin related programs and then remove them.
Window 8
(1) Move the mouse cursor to the bottom right corner of the screen.
(2) Click Settings on Charms bar and go to Control Panel.
(3)Select Uninstall a program and remove $Recycle.Bin related programs.
Step Three: Show all hidden files and clean all the malicious files about $Recycle.Bin.
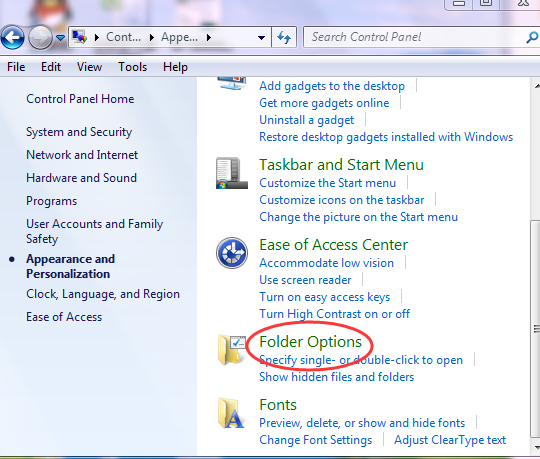
(1) Click the Start button and choose Control Panel.
(2) Clicking Appearance and Personalization, and then find Folder Options then double-click on it.

C(3%24H8US44Q)I45.png)
(3) In the pop-up dialog box, click the View tab and uncheck Hide protected operating system files.
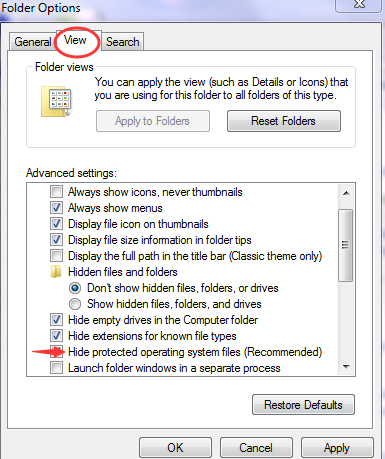
(4) Click OK and then delete all the harmful files created by $Recycle.Bin.
%AppData%\<random>.exe
%CommonAppData%\<random>.exe
C:\Windows\Temp\<random>.exe
C:\Program Files\<random>
HKEY_LOCAL_MACHINE\SOFTWARE\Microsoft\Windows NT\CurrentVersion\Image File Execution Options\msmpeng.exe
HKEY_LOCAL_MACHINE\SOFTWARE\Microsoft\Windows NT\CurrentVersion\Image File Execution Options\msseces.exe
HKEY_CURRENT_USER\Software\Microsoft\Windows NT\CurrentVersion\Winlogon "Shell" = "%AppData%\<random>.exe"
HKLM\SOFTWARE\Classes\AppID\<random>.exe
(Sometimes $Recycle.Bin damage different systems via dropping different files and entries. If you can’t figure out the target files to delete or run into any other puzzle that blocks your manual removal process, you could get a professional removal tool to kick $Recycle.Bin’s ass quickly and safely.)
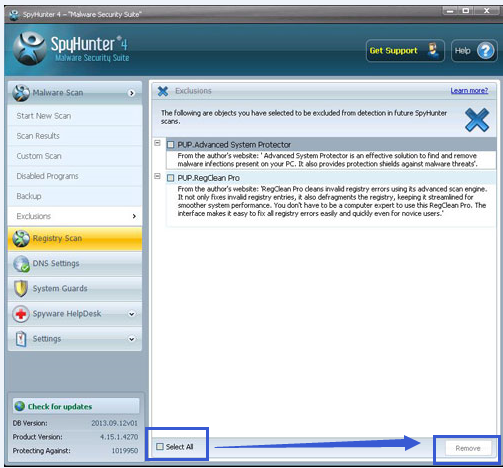
Solution Two: Use SpyHunter to remove $Recycle.Bin completely
SpyHunter is an adaptive antimalware detection and removal tool that provides rigorous defence against the newest threats including adware, malware, trojans, rootkits, bootkits and malicious software. SpyHunter's most advantageous feature is the free of charge Spyware HelpDesk, which can generate specific custom fixes for your unique problem.
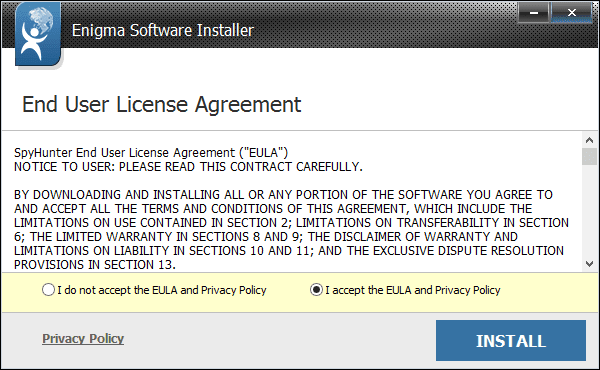
Step 1. Click the icon below to download Spyhunter antivirus program.

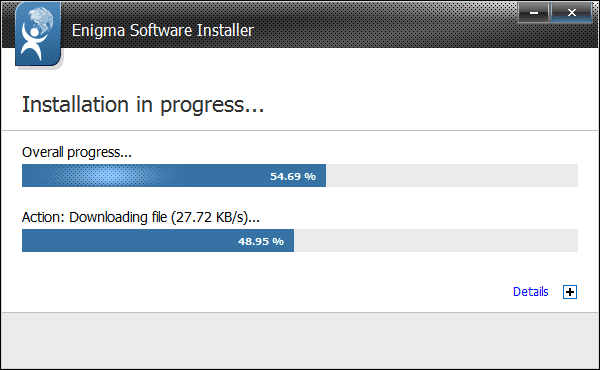
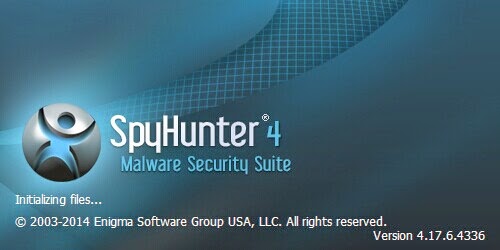
Step 2. Next, you should follow steps to get Spyhunter installed into your computer.

Step 3. After Spyhunter get installed, you just need to scan your computer to find out these threats.
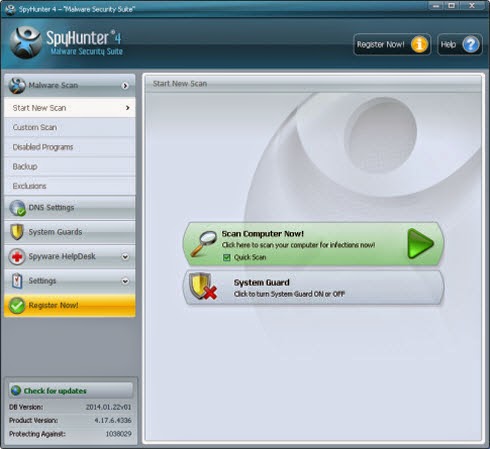
Step 4. Basically, anything if it is harmful or suspicious will be detected, and Spyhunter can help you take care of everything as long as you click the remove button.
Step 5. Just for making sure all threats are fully cleaned up, you are suggested to reboot your machine to give it a second check.
Note: If you haven’t sufficient PC expertise and don’t want to make things worse, to remove $Recycle.Bin safely and permanently, it is recommended to download SpyHunter to clean up the infection in a few minutes without repeating. Hurry up to drag all the PC bugs away from your computer forever!
No comments:
Post a Comment
Note: Only a member of this blog may post a comment.